Mac/Windows Laptop Camera is Not Working: 5 Easy Tricks
A Mac or Windows laptop camera not working can be a huge disadvantage-especially if you are working in a remote location. The Covid- 19 pandemic normalizes virtual meetings immensely- and cameras & webcams are an integral part of it. You also need them in online lectures or seminars or even simply to connect with people far away from you! It plays a huge role in letting you stay connected if you are away from the people you work with.
That’s why we understand how frustrating it is when your laptop webcam or laptop camera is not working. There can be many reasons why your camera has either stopped working or is glitching– ranging from internal issues to hardware problems.
While most desktop PCs have external webcams, laptops usually have inbuilt cameras for both Windows and Mac Systems. Enclosed in this blog is how to figure out why your Windows or Mac laptop camera is not working- and 5 easy troubleshooting options you can try out at home to attempt to fix the problem!
Why is my Laptop Camera Not Working & How Can I Fix It For Windows?
1. Update Your Laptop’s Camera Driver
One reason why your laptop’s camera is not working might be the camera driver not being updated. With these few easy steps, you can make sure your driver is upgraded to match your hardware. Make sure you are connected to a stable internet connection before you start.
- Open Device Manager by right-clicking on Start.
- Find and Click on Imaging Devices. You will view an expanded list.
- Right-click on the Laptop Camera Option.
- Go to Update Driver Software.
- You will find an option that asks you to choose “How you want to search” for the driver. In this select
- Search Automatically for Update Driver Software.
- After this choose Let Me Pick from a list of device drivers on my computer.
- Select USB Video device. After Clicking Next, you can follow the rest of the instructions.
- Once you have followed all the steps, you can restart your laptop
2. Try to Reinstall Your Laptop’s Camera
Follow these easy steps to reinstall your laptop’s camera. You can try out this method if your Laptop’s Camera is not working.
- Open Device Manager by right-clicking on Start.
- Find and Click on Imaging Devices. You will view an expanded list.
- Right-click on the Laptop Camera Option.
- Click on Uninstall
- Reboot or Restart your Laptop.
- Once your laptop restarts, the driver will be installed automatically. Check if the camera works once this is done.
3. Run a Hardware Troubleshooter
- In the Control Panel section, select “View by Option” on the top right.
- Select Large Icons in the drop-down.
- In this choose Troubleshooting. On the left pane select view all.
- After this, choose Hardware and Devices. Click on Next.
- The troubleshooter will start running a check to detect if there are any issues with the hardware- including the camera.
If your laptop camera is not working despite these steps, try a few more methods below:
4. Change your Camera Privacy Settings
Many times, the camera privacy setting on your laptop will be turned off. This may be the reason your laptop camera is not working and often does not even ask for permission. It’s extremely easy to turn this camera privacy setting on by following these steps:
- Select Settings in Start.
- In the Search option, type “webcam”.
- A drop-down will appear. In the same select Camera Privacy Settings.
- You will see an option that says “Let Apps use my camera”. Turn on the toggle for the same.
5. Check Laptop’s Antivirus Software
Usually, if you get an error message that says the laptop camera cannot be started or the laptop camera cannot be found, there’s a chance that your device has an antivirus software issue. Many antivirus applications do not allow the camera to function.
In such a case, go to the settings or permissions of the antivirus application installed on your laptop and check for camera/webcam-related settings.
why is my laptop camera not working & How Can I Fix It?
1. Use Safe Mode to Restart your Mac
Let’s Start with the basics. If anything is not working, the first reflex is to turn it off and then on again. Similar is the case when your laptop camera is not working. Restarting your computer gives it a refresh and all the systems and applications. This can solve any issue bugging the camera.
If restarting your Mac normally does not work, you can restart it using a safe mode. When you do this, your Mac only fires up systems and applications that are absolute essentials. If your camera still refuses to work, you can assume the problem arises from third-party software.
To Restart your Mac in Safe mode, simply restart it first. While your Mac is starting up again, press and hold down the shift key. After this when the login window appears, you will see “Safe Mode” on the top right of your screen. Do keep in mind that this process is a little different for Macs that use M1 processors
2. Close any Other App using the Camera
When you are in crunch mode, you can have multiple tabs and applications open. In the rush of things, there could be an app denying your camera from working. Either check up on all the apps or close them completely in case your laptop camera is not working.
You can also check what apps are using the camera in the Activity Monitor.
Check out this blog to keep your macOS and Applications Up to Date!
3. Check the Preferences of the Application in Use
If the problem is not from any other apps, it could be coming from the app in use. Many apps do not have default permission to launch the camera. In such a case, you will have to go to the settings or the permissions of that specific app and turn it on, if your laptop camera is not working.
4. Turn on the Camera Using the Terminal
In some models of MacBooks, the camera is not working or the camera can’t be turned on manually. It just turns on when you open up an application using a camera. But if that is not happening, you might have to turn on the camera manually. Follow these steps to do so:
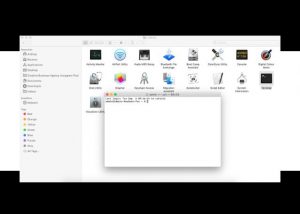
- In Finder, go to Applications on the left side list. In that, select Utilities and then choose Terminal. A window will appear.
- In the window, type in “sudo killall VDCAssistant” and enter. After doing this, the command will forcefully quit any applications using the camera.
- You will need to enter the password you use when logging in.
5. Reset Your Mac’s System Management Controller
All Macs and iMacs have iSight Cameras regulated by the SMC. It is responsible for meager functions such as fan and cooling, so resetting this can help if your laptop camera is not working. These are the steps to follow:
- Plug in the charger and connect your laptop to an electricity source and shut it down.
- When it’s fully Shut down, press and hold Shift + Control + Option + Power. Your Mac will reboot after a while.
You can follow this process if your Mac has a T2 chip.
- After your Mac is completely shut down, press and hold down the power button for around 10 seconds. Then release it.
- Start up your system again and shut it down again.
- Now press and hold Shift + Control + Option for another 7 seconds.
- After the time has passed, also press down the power button with the keys above for another 7 seconds.
- After this is done, release everything and simply turn on your laptop.
Conclusion:
If your laptop camera is not working despite trying these methods out, there is a possibility that the camera is broken. In such a case you will need a laptop care and repair service that knows how to solve this issue. At Macviewer, we have fixed countless laptop cameras not working effectively!
We can also come to get your laptop or mac where you are and deliver it back fixed in the turnaround time! Visit our site to benefit from our handy laptop services today!
Read this blog to find out how to turn on a laptop that won’t start.
Vilas October 24, 2022 Laptop, Laptop tips & tricks, MacBook, Windows